I created a free and simple Personal Expense Tracker!
After browsing endlessly in the sea of personal finance apps, I could not settle on any of the available options. I tried multiple apps like Mint and YNAB but I couldn't stick with any of them. To be honest all the apps I did try were more than capable to track my expenses but often filled with bloated features that were overwhelming for my daily usage.
Since what I was really after was a very simple app to track my day-to-day expenses, I figured I could probably start a new little project and create a personal expense tracker. And so I did!
Before actually creating the tracker there were a couple things to do beforehand. The first thing was I had to actually plan out what I wanted in a tracker because you know this was the whole reason why I didn't download and use an already made solution. I didn't want mine to have a bunch of features that weren't going to be used. What I came up with that was crucial for my day-to-day tracking was:
- Automated in-take form
- Time-based filtering
- Monthly comparisons
- Expenses broken down by categories
A lot of the apps out there had a really streamlined process to input your expenses, some of them even had it automated if you connect your bank account (although i am not really a fan of that). Thinking about it, I am genuinely shocked that this is not a typical feature for any of the Big 5 Banks at least not that I am aware of. I wanted a simple form that can take the details of my purchase and automatically upload to my tracker (spreadsheet).
Similarly, what makes a good tracking app is the ability to view your expenses in a variety of different forms. Now realistically, the tracker I am going to make probably won't have the most advanced views and that's okay because we are aiming for simplicity. But I at least wanted a simple filter to compare expenses between months and the ability to see the type of purchases.
Fast forward into the future and here we are, I spent a couple of nights to create a simple tracker using Google Sheets and Forms (and a bonus iOS shortcut!). Below you can access the templates and make a copy for yourself. But we'll go through each of the pieces and explain some of the parts.

The "brain" - controls and displays your expenses


The "ear" - listens to your expenses
Track from your iOS device!
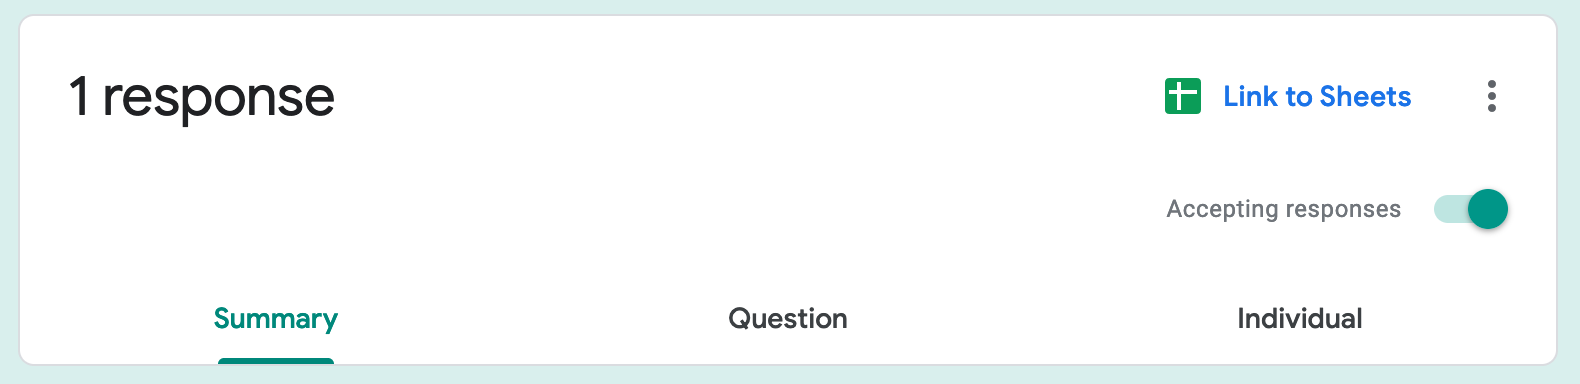
Lets look at the Google Form first. In terms of setup, there is only one thing you need to do. After downloading a copy to your own drive, you will need to connect your form to the expense tracker Google Sheet in the "Response" tab while in editing mode. Once it is connected your in-take form is all setup and ready to go! easy peasy!
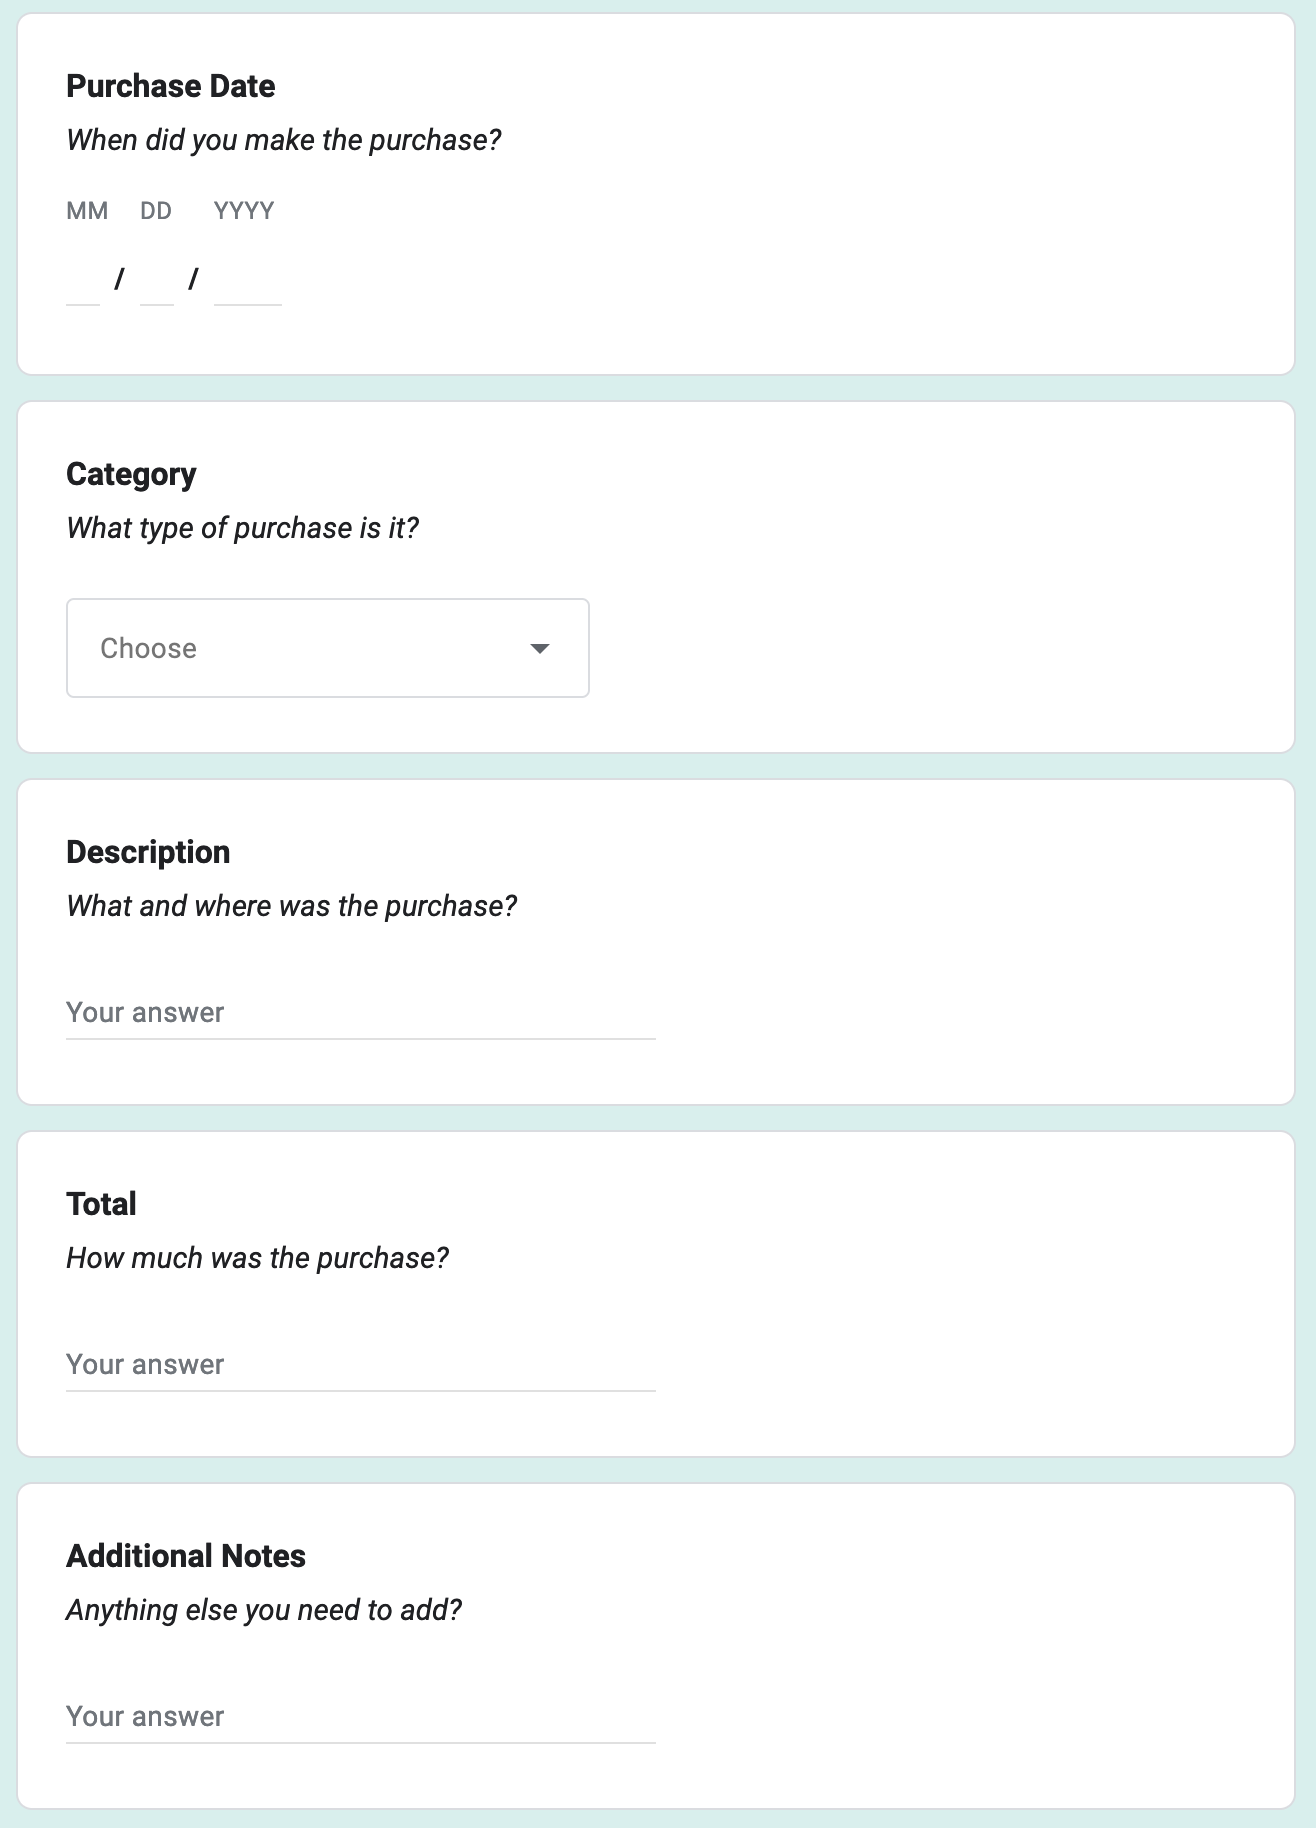
The form itself is very simple and currently only consists of 5 sections. At the time of making this tracker, these were the most important details for me but feel free to add, edit or remove questions to what fits you best. Very quickly, the 5 sections to the form are:
- Purchase Date: captures when you made the purchase
- Category: captures what kind of purchase it is at a high level (based on common budget topics)
- Description: captures the finer details of the purchase
- Total: captures how much the total expense was
- Additional notes: capture anything that else that is important (e.g. take note a friend split the bill or you paid half credit-card & half cash)
A couple of quick notes on this section...
Section 3 for the description — I generally keep the "what" part short maybe one or two words. Then I like including the word "and" as a text separator. If you find yourself needing to use "and" more often, you could substitute it to anything you like even characters or symbols (/,|) . The intention is to have a distinct separator so in the future I can easily parse and quantify where I've been shopping.
Section 4 total — what the total is, is totally (no pun intended) up to you. Feel free to edit the question to include different taxes, subtotals and even tips. Remember the form should be what is best for you and understanding your expenses.
When your finished click submit and send it off to your tracker. Of course since this is on Google Forms it is pretty accessible on all devices, so feel free to use it on your phone or desktop with your favourite browser. If you want to streamline this process just a little bit more, checkout the shortcut section where you can submit an expense from a simple click on your iPhone homescreen.
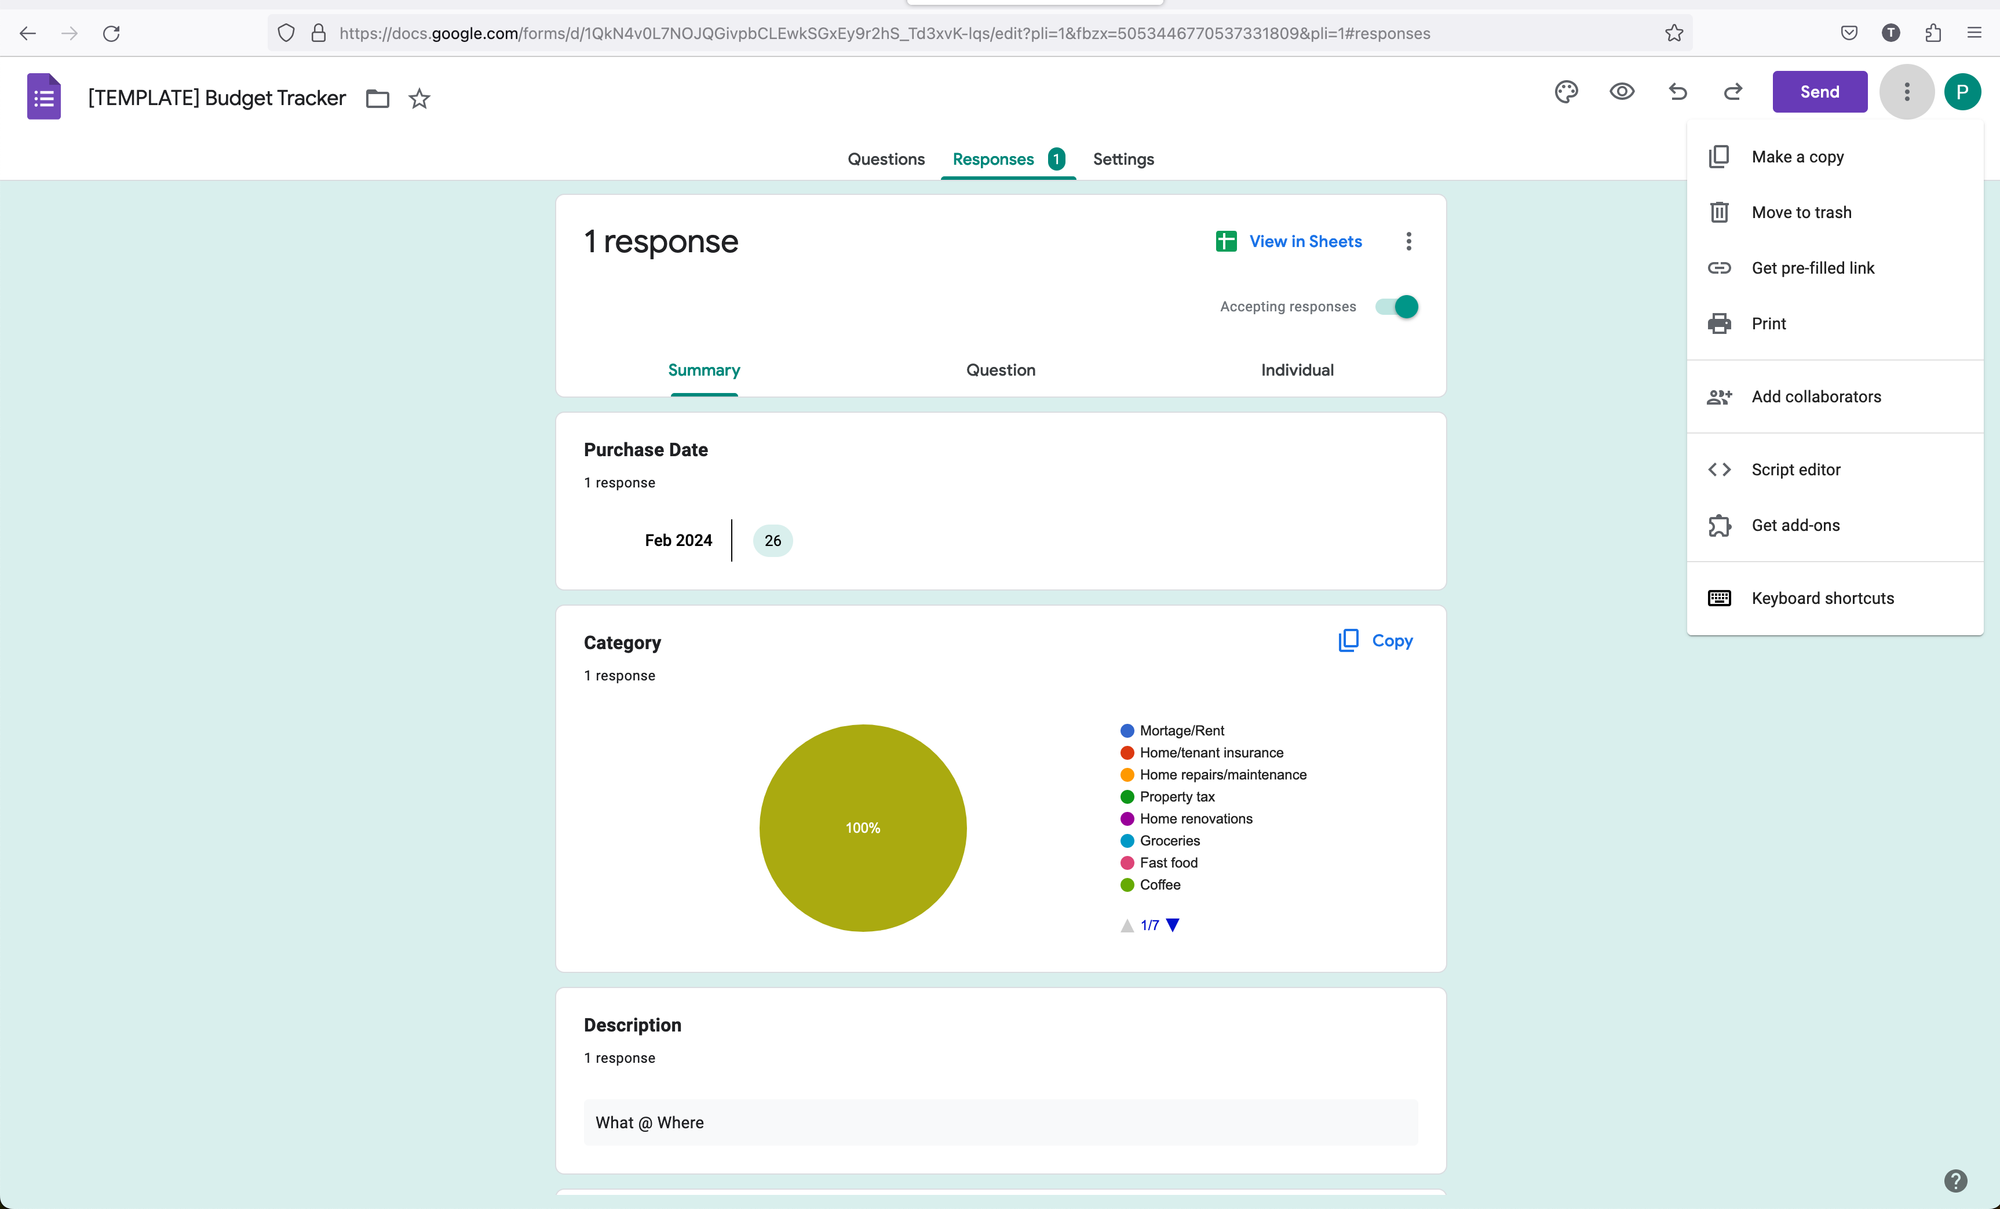
Now looking at the the Expense Tracker Sheet, there are a couple steps required to get it up and running. First things first is to rename the newly made linked form sheet to "RAW DATA". Technically you can rename this to whatever but generally speaking its a standard naming convention for what is the original/untouched data. Acting as a reminder to not edit or change unless necessary because you run the risk of overwriting or losing data. In most cases you make a copy of the data so you can access and edit it with no repercussions, which we will discuss in the next part of the setup.

After you rename the tab to your liking, you will need to connect it to the 02 EXPENSES tab. To do this, you will go into the tab and edit the formula in the cell of "A2", which would be the first empty cell in the top left corner of the sheet. Inside the cell will be a formula '={'RAW DATA' !A2:F}' where you can change 'RAW DATA' to whatever you changed the name to the tab you linked in the previous step. If you decided to name your linked tab the same as RAW DATA, there should be no change needed and the formula should work as intended (as long as you deleted the original RAW DATA, as per the note above). In case it does not and you see #REF, double check your spelling and make sure the name of your tab is between the single quotations. You can test to see if it works by submitting test data through your form, if it shows up in 02 EXPENSES you are all set up and ready to track!

With your sheets all setup you should be ready to start your tracking! You can view your tracker under the 01 DASHBOARD tab, which functions as a holistic view of all your expenses broken down by the default categories I setup. Again totally customization to what best suits you and your lifestyle. The dashboard will automatically update based on all the data in 02 EXPENSES. Currently you can only view your expenses Month over Month and filter by date which can be done by entering a numerical date where specified.
I left a few rows open in each of the categories in case you needed to make any changes to the subcategories. If you are editing subcategories, make sure to edit the Google Forms Category question accordingly. In the case you need additional rows, you will need to copy the formulas down but everything should remain intact.

And there you have it, a pretty simple and free expense tracker that you can use without overwhelming you with all the extra bells and whistles! Feel free to use it as a starting template and customize it to best suit your needs. This was a fun little project, and there are still plenty of areas to improve the tracker. In the future I want to add visualizations, an in-depth stats page and budget capabilities. We are just scratching the surface of the power of a Google Sheet. Be on the lookout for future updates! hopefully...
#003
But wait there's more!
The bonus! for those who are iOS users and made it to the bottom, there's an awesome Shortcut that you can run directly from your device without having to use a browser. I found this post by the Reddit user u/senatorforlife that explained step-by-step on how to build and submit a form submission through URL. I won't go into the details but essentially we will create input fields in Shortcuts that will then be added to a Google Form URL that automatically submits when entered.
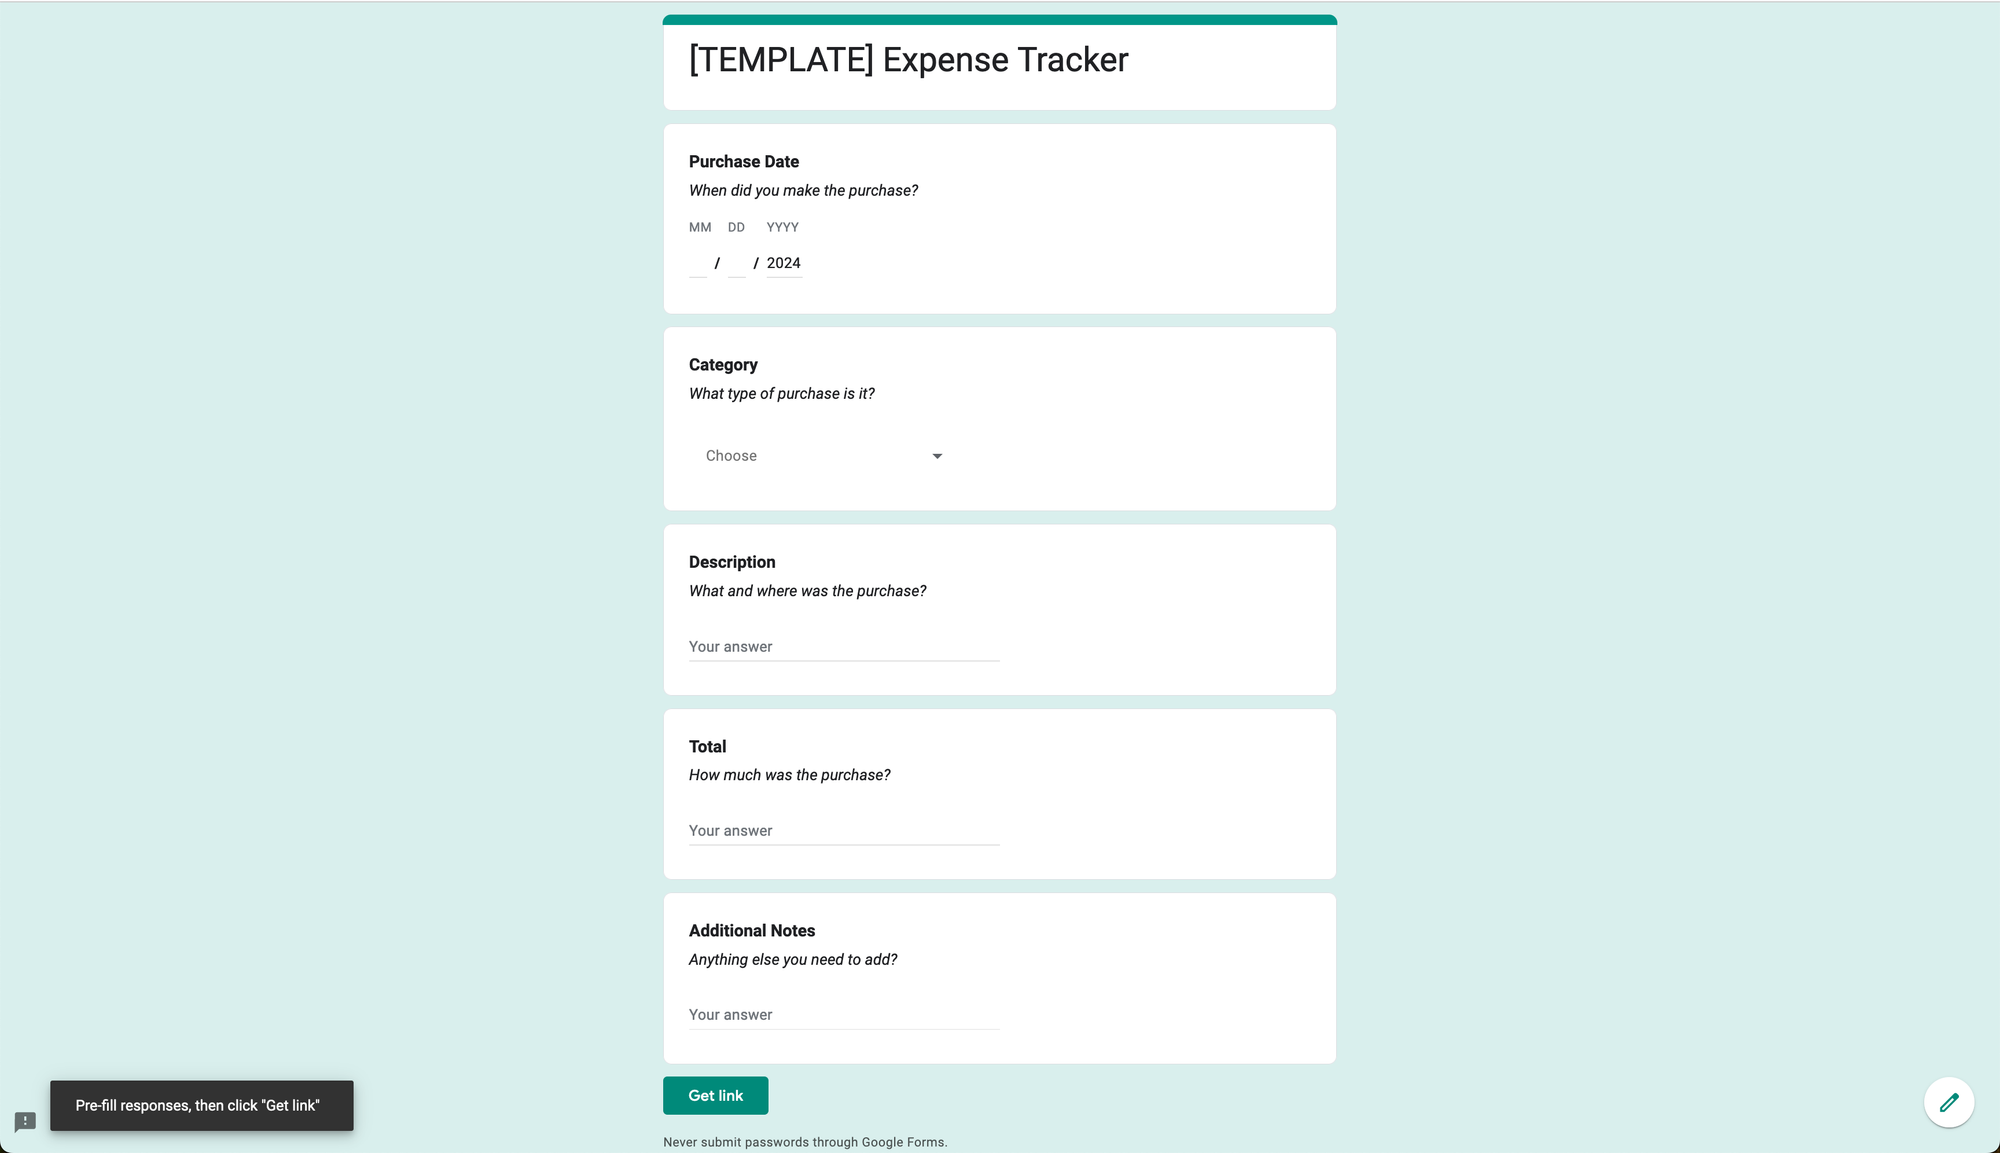
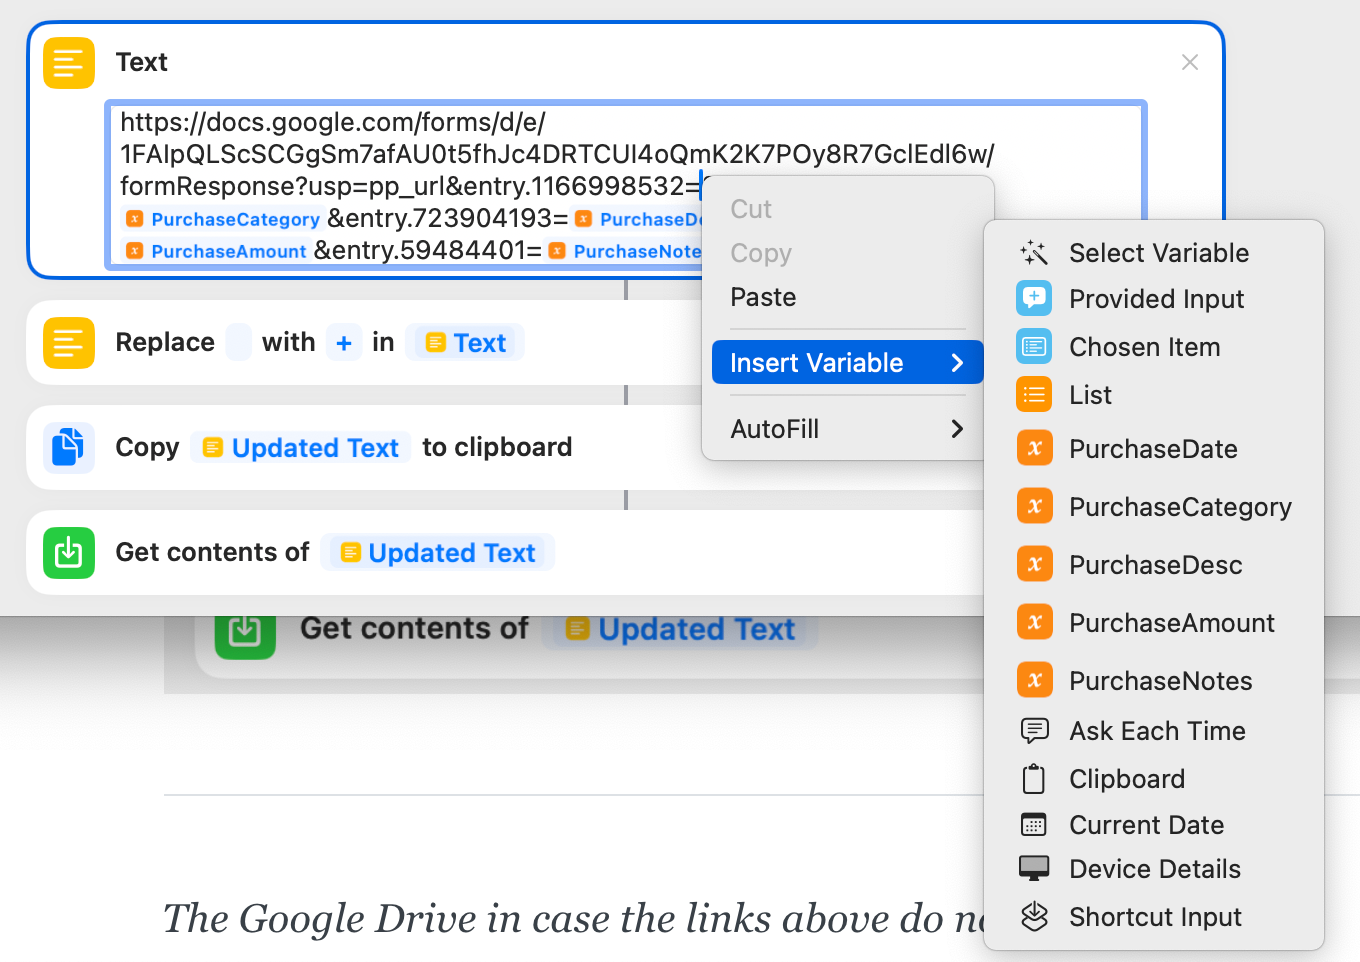
There is one thing required to get the Shortcut working once you have a copy of it on your phone. Currently the Shortcut will be linked to the template I made so you will never see the responses show up in your own sheet. To change this you will need to get the "pre-filled link" that can be accessed via the menu in the top right corner of the Google Forms editing view.
It will lead you to a blank version of the Google Form, add some default values for each question. We add some values here so it is easier to find in the link for when we need to edit it in Shortcuts. Once done, press "Get Link" at the bottom to generate your pre-filled link.
Once you have the pre-filled link, you can open the Shortcut in editing mode and scroll to the bottom. There will be a box labelled Text with a big Google Form URL. Simply replace the old link with your new link that you just generated.
Once pasted, you will need to add your inputs back into the URL as shown below. This links your Shortcut inputs to the Google Form. After every &entry there will be an equals sign with your default values you chose in the earlier step. Erase your default value and right-click to Insert Variable. Add the required variable based on what your default value was or the question order of your Google Form.
When it's all said and done, your link should look something like the picture below. Your Shortcut is done and ready! Exit out, give it a run and you should get input prompts based on your Google Form. If all goes well, after you submit it should show up into your Google Sheet. For my Android friends, I am looking if there is an alternative!
